Tools and commands (Products)
The object editing toolbar includes several tools and commands to work with products in your current planogram:


Some additional commands that also apply to most objects can be found in another toolbar described in General edit commands:
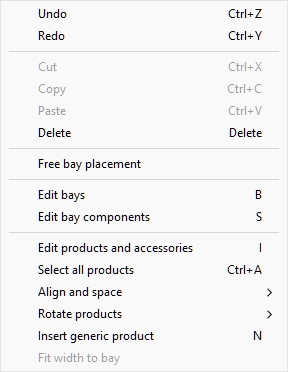
All the tools and commands to work with products are also available in Main Menu > Edit:
The tools and commands which are specific to products are described below.
Edit products and accessories
This tool lets you select Items (products and accessories) to perform various operations such as editing their properties, moving and copying them.
- Keyboard shortcut: I
Instructions:
- Click on the button labeled Edit products and accessories.
- Type the shortcut key (I).
- Or click on the command in the main menu > Edit > Edit products and accessories.
Note: The keyboard shortcut and the menu command activate this tool without automatically switching to any corresponding task: Products, Accessories, Item Info.
Select (Edit products and accessories)
To select items, first activate Edit products and accessories.
Note: Selected products are tinted in blue.
Select 1 item, there are 2 methods:
- Method 1: click on an item in the visualization area.
- Method 2: click on an item line in Project item list.
Select several items, there are 4 methods:
- Method 1: hold Ctrl and click on each desired item in the visualization area.
- Method 2: hold Ctrl and click on each desired item in Project item list.
- Method 3: by range:
- Hold Shift and Click on an item.
- Click on another item on the same row or same shelf.
- The clicked items, plus the items in between become selected.
- Method 4: by rectangle:
- Press the mouse button somewhere in the visualization area where there is no item.
- Keep the mouse button pressed and drag your cursor to another point in the visualization area: this will draw a blue rectangle on the screen.
- Release the mouse button: all the items that are within or cross the blue rectangle become selected.


Select all products
Use the dedicated command in the main menu > Edit > Select all products. Note: this command doesn't select any accessory.
- Keyboard shortcut: Ctrl + A
To deselect products and accessories:
- To deselect one item at a time, hold Ctrl and click on each item to deselect in the visualization area or in Project item list.
- To deselect several items, hold Ctrl and draw a rectangle across the items to deselect in the visualization area.
- To deselect all items, click on an empty area of the visualization area.
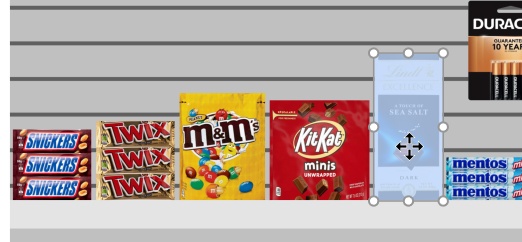
Adjust product quantity
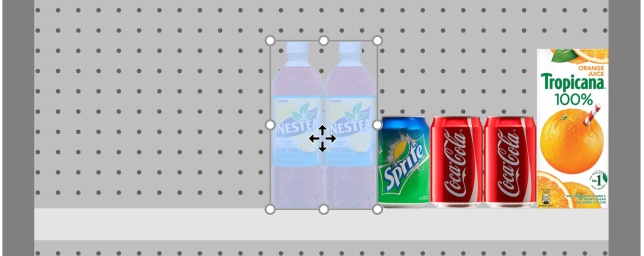
You can change the quantity of selected products in a planogram in each direction with your mouse.
- Activate this tool: Edit products and accessories.
- Select products only (consult Select (Edit products and accessories)). They become highlighted with round handles
- If the round handles do not appear on the selected products, use Zoom to enlarge them on screen.
- Grab a handle with the mouse and drag it in the desired direction(s) until your products reach the desired quantity. The corner handles let you adjust in two directions; while the handles along edges let you constrain the adjustment to one direction.
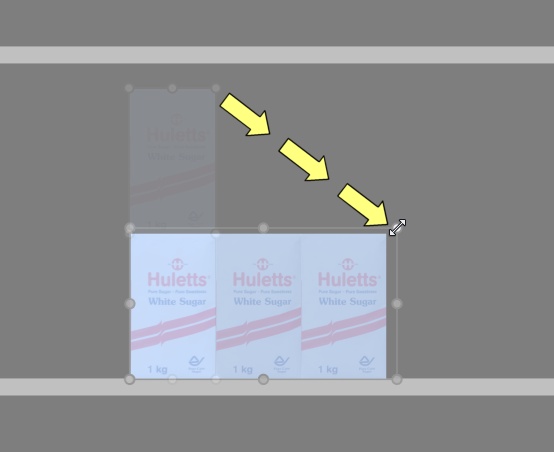
- Release the mouse button when you are satisfied with the quantity.
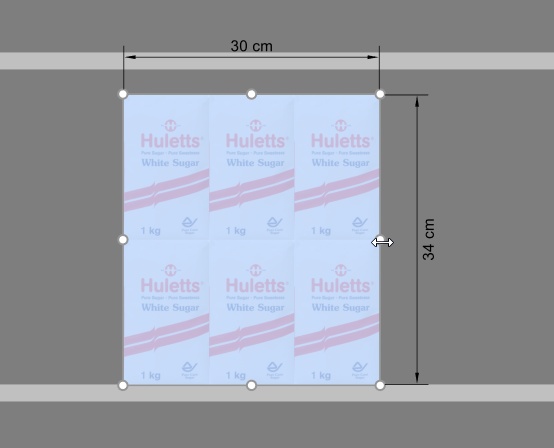
Tip: View dimensions is useful to see the space to allocate to the product:

Tip: View dimensions is also useful to display the actual exact dimensions used by each block of same products by pressing on a handle of the selected product:
Keyboard shortcuts:
- Increase / decrease Facings wide: Hold the Shift key and press the + and – keys on your numeric keypad.
- Increase / decrease Facings high: Hold the Space key and press the + and – keys on your numeric keypad.
Tip: You can also set the quantities of products by specifying numeric values in Item Info.
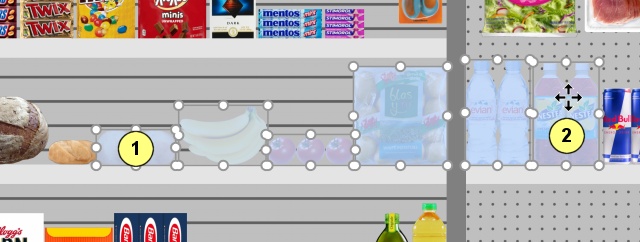
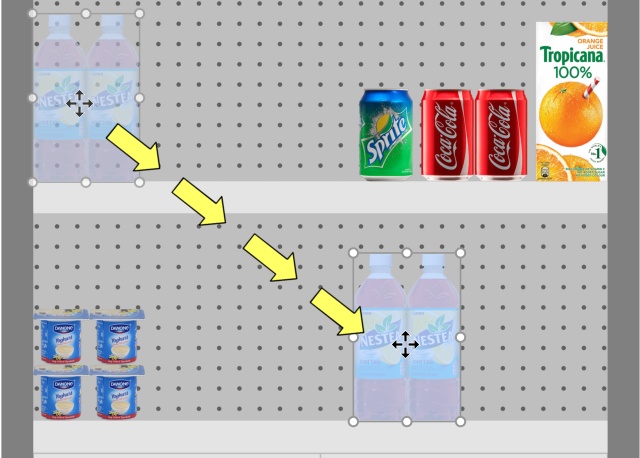
Move (Edit products and accessories)
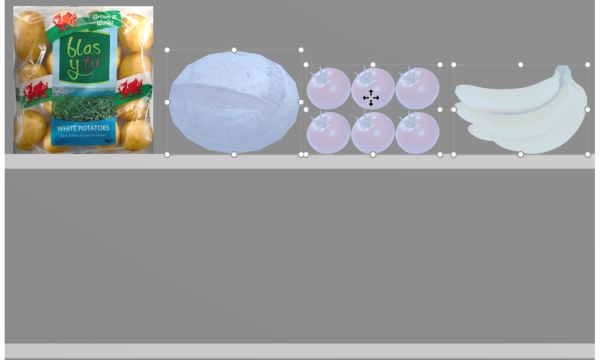
You can move items with the mouse in your current planogram.
- Activate this tool: Edit products and accessories.
- Select (Edit products and accessories).
- Press and hold the mouse button with the pointer over the selected items and drag the mouse to the desired new position, even to another bay.
- Release the mouse button. The items are now in the new position.
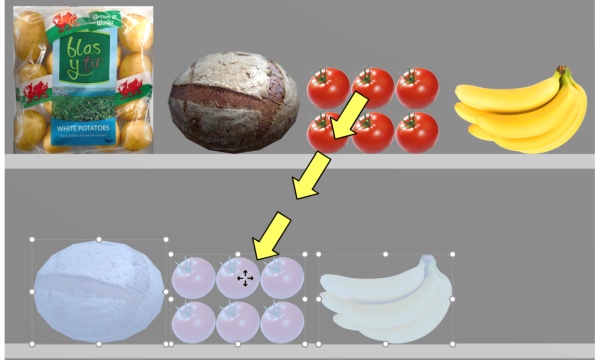
If there is some empty space between items, it is very easy to close these gaps thanks to the collision detection feature:
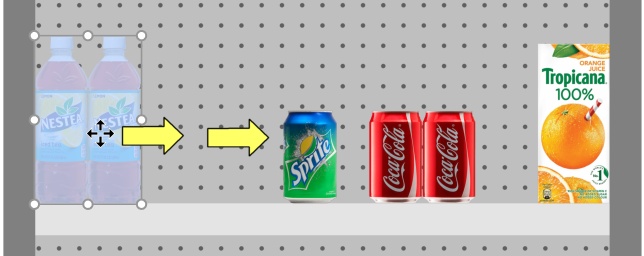
- The other items will be pushed along the shelf much like in the real world:
Tips:
- If you want to move one or more pegged products to a shelf or vice versa: hold the shift key until you drop the products in position, thereby switching their behavior on the fly.
- There are times when you may want to temporarily disable collisions to avoid displacing other products while moving a product. Hold the C key pressed while dragging the product to achieve this. Collisions can also be entirely disabled in Collisions (Settings), or for specific products in Collisions (Item properties) in case they must overlap.
- You can lock accessories in place (Locked accessories) to prevent accidentally moving existing accessories while moving products.
- To allow products straddling on 2 bay components, consult Allow lateral overhang (Selected shelves), Allow lateral overhang (Selected back panels).
- You can configure the application to automatically position products adjacent when they are close to each other (Auto snap distance).
Copy by moving (Edit products and accessories)
Copying is almost the same process as Move (Edit products and accessories):
- Select items.
- Hold Ctrl.Drag the items to the desired location.
Release the mouse button.The items are duplicated at the desired location.
Important note: Do not use the copy function to create a block of the same products. You should instead adjust the number of instances of the products in Item Info (Facings wide, Facings high).
Note: Collision detection is automatically disabled when copying products.
Tips:
- You can also use the commands named Copy (Edit) and Paste (Edit) to copy products, even between different projects.
- When you copy a generic product, it creates a new independent generic product which can then be edited to have distinct characteristics such as dimensions, name, etc. Consult Insert generic product.
Insert generic product
Sometimes, you may need to include in your planograms some products that are not available in your database, such as seldom used competitor products. In this case, PlanogramBuilder lets you create some generic products as simple blocks in your current planogram.
- Keyboard shortcut: N
Instructions:
- Click on Insert generic product on the toolbar or in the main menu > Edit.
- The method to place your product depends on
where you want it:
- To place it on a shelf, put your mouse cursor over the area of a shelf where you want to add the product.
- To place it on a back panel, hold Shift, put your mouse cursor over the area of a back panel where you want to add the product.
- Click the left mouse button to confirm and create the generic product.
- Each generic product has default values for
upon creation. To adjust its properties:
- Activate the task named Item properties.
- Change the name, color, dimensions, the number of facings, etc.
Notes:
- Generic products have default values for upon creation. You can
- Generic products are always presented as simple boxes with no image.
- In standard view, a text label is displayed on the front showing the name of the product if has been defined. In Schematic view, the label can show different information depending on Schematic view (Settings).
- You can also specify the font for the labels of generic products (Font face, Font height).
- Generic products are only saved in your current project, but not in the database. If you wish to add products to the database (so that they are shown in the catalog), consult Database for detailed instructions.
- If you copy a generic product (consult Copy by moving ), it creates a new independent generic product which can then be edited to have distinct characteristics.
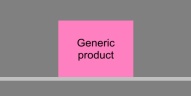
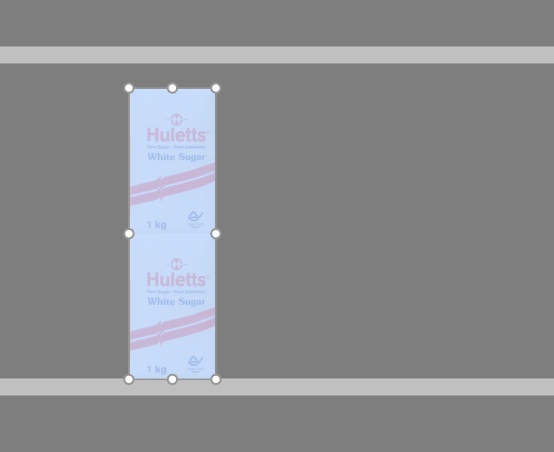
Example of a block of a generic product with a name.
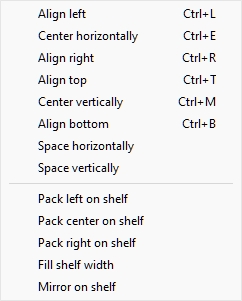
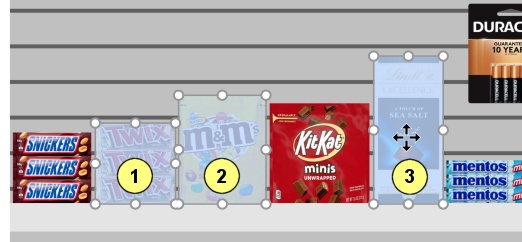
Align and space (products and accessories)
There is a series of handy commands available to distribute multiple items on the shelves.
Instructions:
- Activate this tool: Edit products and accessories.
- Select the products to align. They become highlighted and a move pointer is displayed.
- Click on one of the align commands on the object editing toolbar or in Main Menu > Edit> Align and space.
- The products are now repositioned accordingly as described below.
Note: Collision detection is automatically disabled when aligning or spacing items.
Important tip: Please make sure to check the description of Spacing applies to each facing because this setting affects the way spacing commands are applied.
The following commands are available:
Align left (products and accessories)
Align the selected objects horizontally to their leftmost edge.
- Keyboard shortcut: Ctrl + L
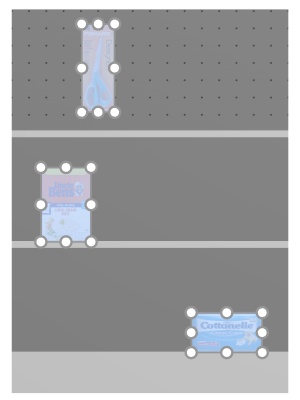
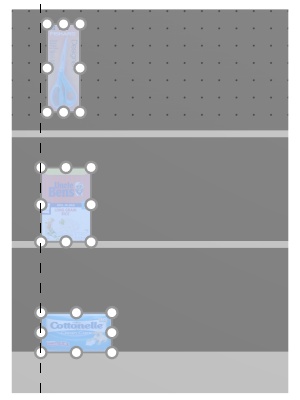
Image on the left: Before alignment
Image on the right: Align left (products and accessories)
Notes:
- Products which are on pegboards are repositioned to the hole which is closest to the virtual alignment line, so not exactly left aligned with other products.
- You can also apply this command to items placed across several bays if the bays are placed side by side, parallel and not too distant from each other.
Center horizontally (products and accessories)
Align the selected objects to their horizontal center.
- Keyboard shortcut: Ctrl + E
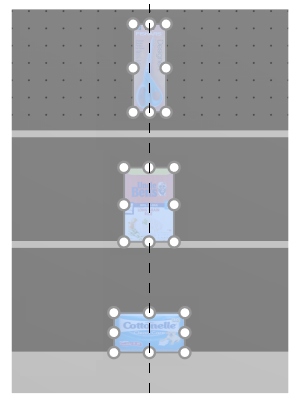
Image on the left: Before alignment
Image on the right: Center horizontally (products and accessories)
Notes:
- Products which are on pegboards are repositioned to the hole which is closest to the virtual alignment line, so not always exactly aligned with other products.
- You can also apply this command to items placed across several bays if the bays are placed side by side, parallel and not too distant from each other.
Align right (products and accessories)
Align the selected objects horizontally to their rightmost edge.
- Keyboard shortcut: Ctrl + R
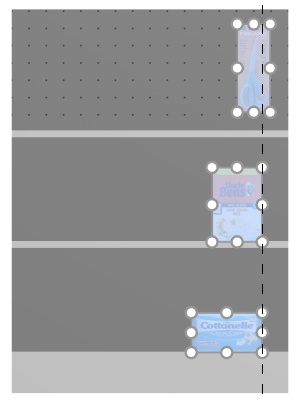
Image on the left: Before alignment
Image on the right: Align right (products and accessories)
Notes:
- Products which are on pegboards are repositioned to the hole which is closest to the virtual alignment line, so not exactly left aligned with other products.
- You can also apply this command to items placed across several bays if the bays are placed side by side, parallel and not too distant from each other.
Align top (products and accessories)
Align the selected objects vertically to their topmost edge.
- Keyboard shortcut: Ctrl + T
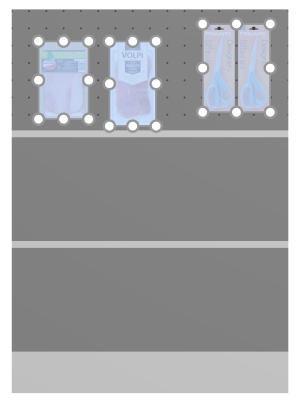
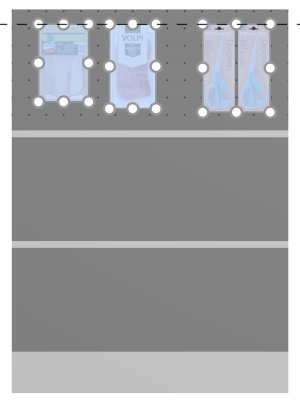
Image on the left: Before alignment
Image on the right: Align top (products and accessories)
Notes:
- Products which are on pegboards are repositioned to the hole which is closest to the virtual alignment line, so not exactly left aligned with other products.
- You can also apply this command to items placed across several bays if the bays are placed side by side, parallel and not too distant from each other.
Center vertically (products and accessories)
Align the selected objects to their vertical center.
- Keyboard shortcut: Ctrl + M

Image on the left: Before alignment
Image on the right: Center vertically (products and accessories)Align top (products and accessories)
Notes:
- Products which are on pegboards are repositioned to the hole which is closest to the virtual alignment line, so not always exactly aligned with other products.
- You can also apply this command to items placed across several bays if the bays are placed side by side, parallel and not too distant from each other.
Align bottom (products and accessories)
Align the selected objects vertically to their lowest edge.
- Keyboard shortcut: Ctrl + B
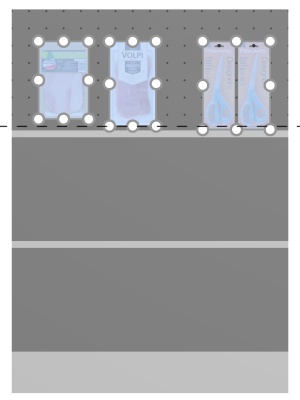
Image on the left: Before alignment
Image on the right: Align bottom (products and accessories)
Notes:
- Products which are on pegboards are repositioned to the hole which is closest to the virtual alignment line, so not exactly left aligned with other products.
- You can also apply this command to items placed across several bays if the bays are placed side by side, parallel and not too distant from each other.
Space horizontally (products and accessories)
Distribute the selected objects horizontally with an equal gap between them without changing the total space used.
For groups of multiple same products in width with Width gap, the effect varies depending on the setting named Spacing applies to each facing as illustrated in the examples below.
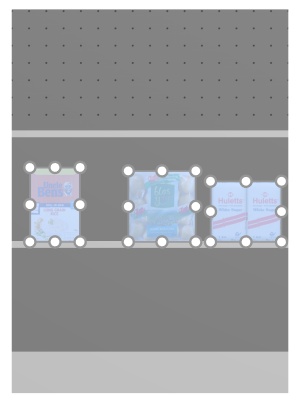
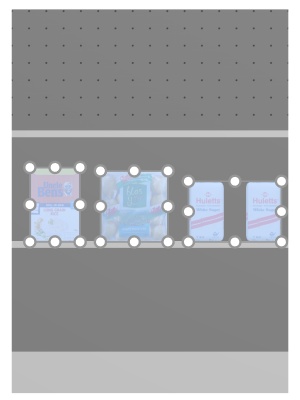
Image on the left: Before spacing
Image on the right: Space horizontally (Spacing applies to each facing checkmarked)
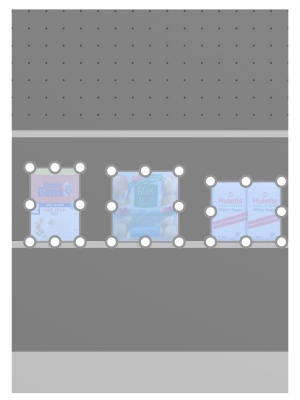
Image on the left: Before spacing
Image on the right: Space horizontally (Spacing applies to each facing not checkmarked)
Notes:
- Products which are on pegboards are repositioned to the hole which is closest to obtain equal spacing, so not necessarily resulting in equal spacing.
- You can also apply this command to items placed across several bays if the bays are placed side by side, parallel and not too distant from each other.
Space vertically (products and accessories)
Distribute the selected objects vertically with an equal gap between them without changing the total space used.
For groups of multiple same products in height with Height gap, the effect varies depending on the setting named Spacing applies to each facing as illustrated in the examples below.
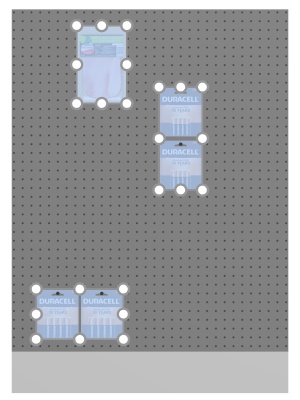
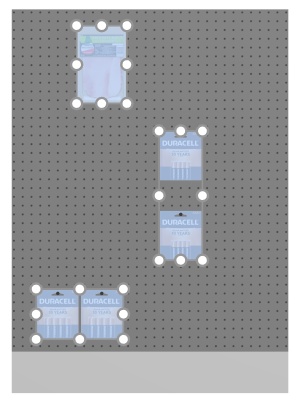
Image on the left: Before spacing
Image on the right: Space vertically (Spacing applies to each facing checkmarked)
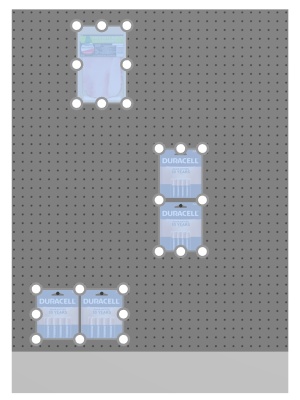
Image on the left: Before spacing
Image on the right: Space vertically (Spacing applies to each facing not checkmarked)
Notes:
- Products which are on pegboards are repositioned to the hole which is closest to obtain equal spacing, so not necessarily resulting in equal spacing.
- You can also apply this command to items placed across several bays if the bays are placed side by side, parallel and not too distant from each other.
Pack left on shelf (products and accessories)
Group the selected products against the left edge of their respective shelves or rows.
For groups of multiple same products in width with Width gap, the effect varies depending on the setting named Spacing applies to each facing as illustrated in the examples below.
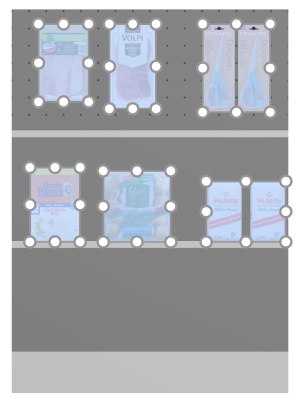
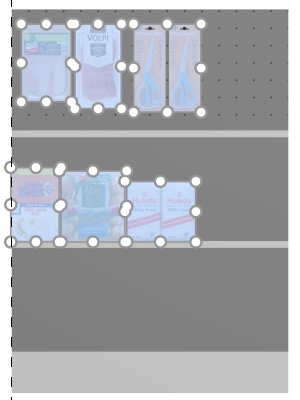
Image on the left: Before spacing
Image on the right: Pack left on shelf (Spacing applies to each facing checkmarked)
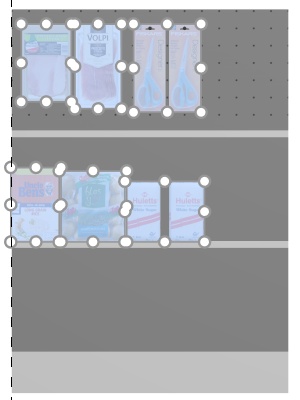
Image on the left: Before spacing
Image on the right: Pack left on shelf (Spacing applies to each facing not checkmarked)
Notes:
- Products which are on pegboards are repositioned to the hole which is closest to obtain equal spacing, so not necessarily resulting in equal spacing.
- You can also apply this command to items placed across several bays if the bays are placed side by side, parallel and not too distant from each other.
- If you have allowed Allow lateral overhang (Selected shelves)/ Allow lateral overhang (Selected back panels) where the selected items are placed, PlanogramBuilder still tries to fit the products within the physical bounds of the shelves / rows. But if the selected products only fit on the shelf / row with an overhang, the minimal possible overhang is applied.
Pack center on shelf (products and accessories)
Group the selected products in the center of their respective shelves or rows.
For groups of multiple same products in width with Width gap, the effect varies depending on the setting named Spacing applies to each facing as illustrated in the examples below.
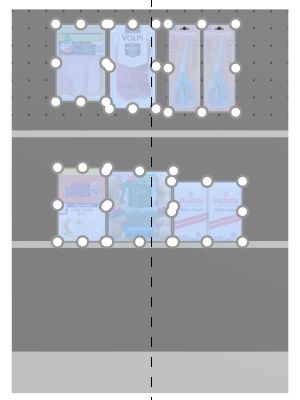
Image on the left: Before spacing
Image on the right: Pack center on shelf (Spacing applies to each facing checkmarked)
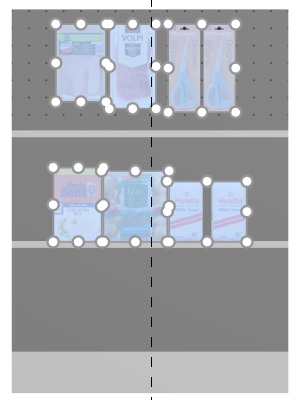
Image on the left: Before spacing
Image on the right: Pack center on shelf (Spacing applies to each facing not checkmarked)
Notes:
- Products which are on pegboards are repositioned to the hole which is closest to obtain equal spacing, so not necessarily resulting in equal spacing.
- You can also apply this command to items placed across several bays if the bays are placed side by side, parallel and not too distant from each other.
- If you have allowed Allow lateral overhang (Selected shelves)/ Allow lateral overhang (Selected back panels) where the selected items are placed, PlanogramBuilder still tries to fit the products within the physical bounds of the shelves / rows. But if the selected products only fit on the shelf / row with an overhang, the minimal possible overhang is applied.
Pack right on shelf (products and accessories)
Group the selected products against the right edge of their respective shelves or rows.
For groups of multiple same products in width with Width gap, the effect varies depending on the setting named Spacing applies to each facing as illustrated in the examples below.
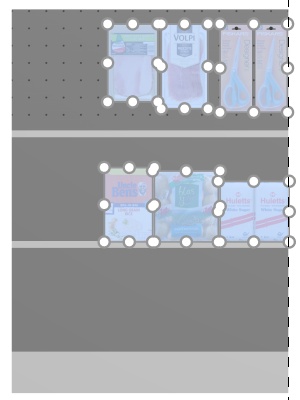
Image on the left: Before spacing
Image on the right: Pack right on shelf (Spacing applies to each facing checkmarked)
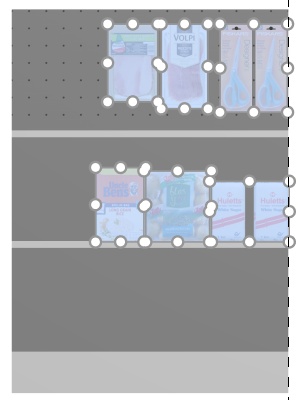
Image on the left: Before spacing
Image on the right: Pack right on shelf (Spacing applies to each facing not checkmarked)
Notes:
- Products which are on pegboards are repositioned to the hole which is closest to obtain equal spacing, so not necessarily resulting in equal spacing.
- You can also apply this command to items placed across several bays if the bays are placed side by side, parallel and not too distant from each other.
- If you have allowed Allow lateral overhang (Selected shelves)/ Allow lateral overhang (Selected back panels) where the selected items are placed, PlanogramBuilder still tries to fit the products within the physical bounds of the shelves / rows. But if the selected products only fit on the shelf / row with an overhang, the minimal possible overhang is applied.
Fill shelf width (products and accessories)
Distribute the selected products with an equal gap between them across the entire width of their respective shelves or rows.
For groups of multiple same products in width with Width gap, the effect varies depending on the setting named Spacing applies to each facing as illustrated in the examples below.
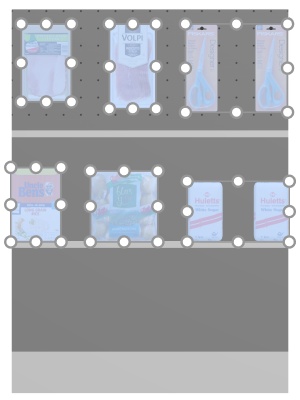
Image on the left: Before spacing
Image on the right: Fill shelf width (Spacing applies to each facing checkmarked)
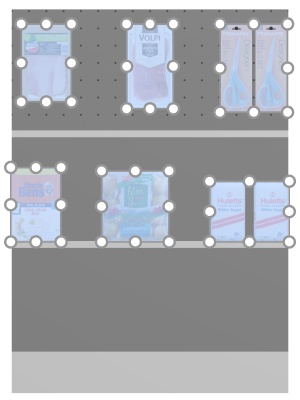
Image on the left: Before spacing
Image on the right: Fill shelf width (Spacing applies to each facing not checkmarked)
Notes:
- Products which are on pegboards are repositioned to the hole which is closest to obtain equal spacing, so not necessarily resulting in equal spacing.
- You can also apply this command to items placed across several bays if the bays are placed side by side, parallel and not too distant from each other.
- If you have allowed Allow lateral overhang (Selected shelves)/ Allow lateral overhang (Selected back panels) where the selected items are placed, PlanogramBuilder still tries to fit the products within the physical bounds of the shelves / rows. But if the selected products only fit on the shelf / row with an overhang, the minimal possible overhang is applied.
Mirror on shelf (products and accessories)
Invert the left-right order of selected products on their respective shelves or rows.
It is convenient for example when you change Flow direction.
For groups of multiple same products in width with Width gap, the effect varies depending on the setting named Spacing applies to each facing as illustrated in the examples below.
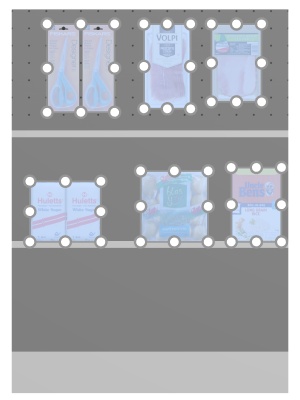
Image on the left: Before spacing
Image on the right: Mirror on shelf (Spacing applies to each facing checkmarked)
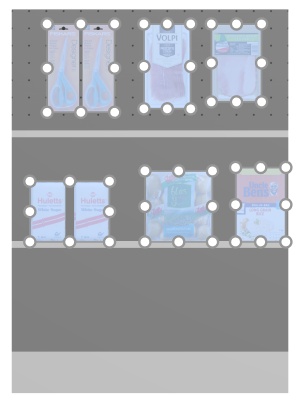
Image on the left: Before spacing
Image on the right: Mirror on shelf (Spacing applies to each facing not checkmarked)
Notes:
- Products which are on pegboards are repositioned to the hole which is closest to obtain equal spacing, so not necessarily resulting in equal spacing.
- You can also apply this command to items placed across several bays if the bays are placed side by side, parallel and not too distant from each other.
- If you have allowed Allow lateral overhang (Selected shelves)/ Allow lateral overhang (Selected back panels) where the selected items are placed, PlanogramBuilder still tries to fit the products within the physical bounds of the shelves / rows. But if the selected products only fit on the shelf / row with an overhang, the minimal possible overhang is applied.
Rotate products
You can rotate selected products by 90-degree increments.
Instructions:
- Activate this tool: Edit products and accessories.
- Select the products to rotate. They become highlighted and a move pointer is displayed.
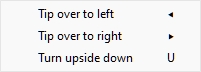
- Click on one of the rotation commands on the object editing toolbar or in Main Menu > Edit > Rotate products.
- The selected products have now been rotated.
Example of a rotated product:

Image on the left: Initial orientation
Image on the right: 270-degree Y rotation
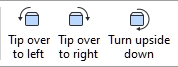
The following commands are available:
Tip over to left
Rotate the selected products to the left on the depth axis (X 90° counterclockwise).
Consult Rotate products for usage instructions.
- Keyboard shortcut: Left arrow
Tip over to right
Rotate the selected products to the right on the depth axis (X 90° clockwise).
Consult Rotate products for usage instructions.
- Keyboard shortcut: Right arrow
Turn upside down
Rotate the selected products by 180° on the depth axis (X 180°): The front face still faces you, but the products are then upside down.
Consult Rotate products for usage instructions.