Screen Layout
Here is an overview of the PlanogramBuilder user interface:

- The name of the opened project. Consult Name (Project properties).
- Top Menu: the Main Menu accessed from the top menu bar.
- Toolbar with Project commands (main window) and General edit commands.
- Toolbar to set planogram display modes. Consult View.
- Tabs to select Tasks for planogramming.
- Toolbar to navigate in Visualization area. Consult Tools and commands (Navigation).
- Visualization area: the visual representation of your planogram
- Toolbar to access Settings, Help and Tutorials.
- Application title and username.
- Application logo.
- Pane of current task: task-specific parameters and information
- Toolbar to edit the various types of objects in the opened planogram: Create bays, Modify bays, Products and Accessories.
- Status bar: typically showing progress of an operation such as uploading.
- Context menu (visualization area): the Main Menu accessed from a right-click.
- Project item list: the list of items in your opened planogram project.
The main elements of the application interface are described below:
Visualization area
The visualization area is where you see the planogram visual representation.
Note that you can also view the contents of your project as a list in Project item list.
Tip: this area can be resized by grabbing and dragging its borders with the mouse.
Tasks
The application is organized in several tasks, accessible from the task tabs. Each task has its own content related to a specific planogramming task, for example working with shelving or managing your product database.
Pane of current task
The pane for the current task is located on the left of the screen.
It includes task-related parameters and information which vary depending on the current task and the selected elements.
Some task panes also include a specific toolbar related to the task at hand.
Tip: most panes can be resized by grabbing and dragging their borders with the mouse.
Toolbars
There are several toolbars on the work screen. Most toolbars are displayed in all tasks so you can always edit your planogram. Each toolbar contains buttons for tools, commands and/or toggles to work on Planograms.
Toolbar buttons
Each button is shown as:
- an icon illustrating its purpose
- an optional text caption under the icon (consult Display icon captions)
Note: If you have a low-resolution screen or if you have set a high display scale in Windows, displaying the captions may prevent all the buttons to fit on your screen. In such case, some toolbars become scrollable to give access to the hidden buttons, but we rather advise turning off captions for ideal comfort.
Tip: Hover your mouse cursor over any button to display a tooltip with:
- its name
- its description
- its keyboard shortcut when applicable
Main Menu
The main menu gives access to tools and commands organized by theme.
The content of the menu reflects the content of the toolbars.
You can access the main menu with two methods, both with the exact same menu items:
Top Menu
This menu is located on the top of the application window and displayed as a menu bar with its first-level sections always visible.
![]()
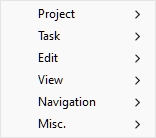
Context menu (visualization area)
This menu is displayed by right-clicking within the visualization area. It contains exactly the same submenus and entries as Top Menu.
Note: there are some other context menus which you can access in some tasks and panels. These are described in their corresponding chapters.