Catalog of products
This pane displays all the products available for planogramming. This is where you can select and drag your products onto shelving.
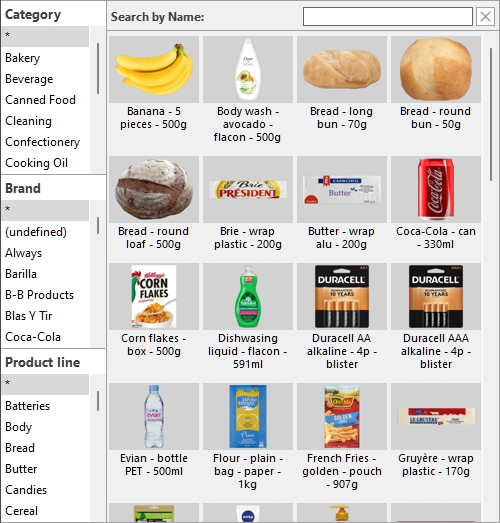
Two catalogs of products are available, using radio buttons for the choice:
Predefined examples (Catalog of products)
This catalog contains a set of sample products provided with the software. They are useful to test the application before adding your own products.
Personal (Catalog of products)
This catalog contains the products added to your database by yourself or by your colleagues.
cf. Database to see how to add your products to your PlanogramBuilder database.
Classification (Catalog of products)
On the left side of the pane, your items are listed in a hierarchical menu with 3 levels. (cf. Item classification properties (Settings) to define these levels.)
Note: the classification of Predefined examples (Catalog of products) cannot be changed.
Each level displays the list of classification values assigned to your items:
- [Item classification properties - Level 1]
- [Item classification properties - Level 2]
- [Item classification properties - Level 3]
Clicking on the values in the hierarchy filters the items displayed in the catalog.
When you select an item in the 1st level of the hierarchy, only the items matching your choice are shown at the 2nd level, and so on for the 3rd level.
Note: items with empty values for a given level in the hierarchy are shown in the (undefined) group for this classification level.
Advice: You can display all items for any of the classification level by selecting the “*” symbol.
Advice: You can navigate in the classification list with the keyboard:
- Move up/down in the list content with the Up/Down arrow keys.
- Move down in the classification levels with the Tab key.
- Move up in the classification levels with the Shift + Tab keys.
Search by text (Catalog of products)
Just above the catalog thumbnails, a text box lets you type text to search and display matching items. When using this method to find items, the hierarchy is grayed out and PlanogramBuilder looks in your entire database to find items matching the text you entered.
Supported values and search rules:
- Multiple keywords must be separated by spaces
- All keywords must be present to match a product
- Keywords are not case sensitive
- The order of keywords doesn’t matter
Example: type frozen CHOCOLATE in the text box. It will display all the items containing chocolate AND frozen in their name.
By default, the search function searches by item name, but you can also set it to search by another property, such as Reference or a combination of properties (cf. Captions & Search). Note that the label of Search by text (Catalog of products) is updated to match your selected search criteria.
To get back to the classification filter method, use the Clear button.
List (Catalog of products)
The right side of the catalog pane displays the list of products corresponding to: Classification (Catalog of products) or to Search by text (Catalog of products).
Each product is represented by a thumbnail and a text description.
By default, the thumbnail caption is the product name, but you can also set it to another property, such as Reference or a combination of properties (cf. Captions & Search).
Add products to a planogram
To place a product from the catalog into your current planogram:
- Find the desired product in the catalog using the classification or the text filters.
- Hold the mouse button down and drag the product to the desired location on the shelving:
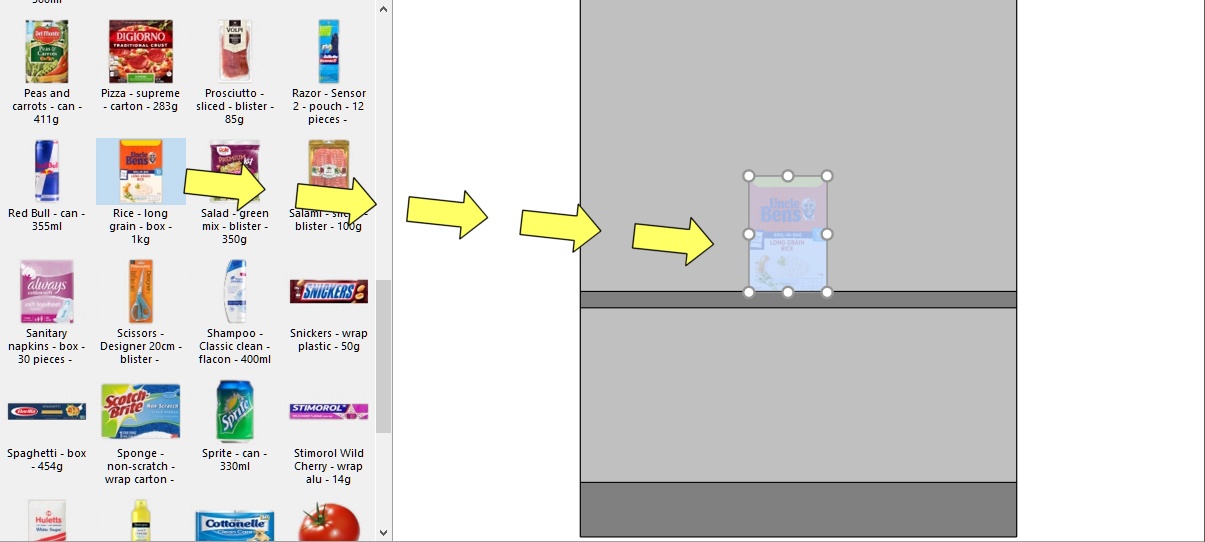
- Products with the following behaviors can normally be dragged onto a back panel: pegged:
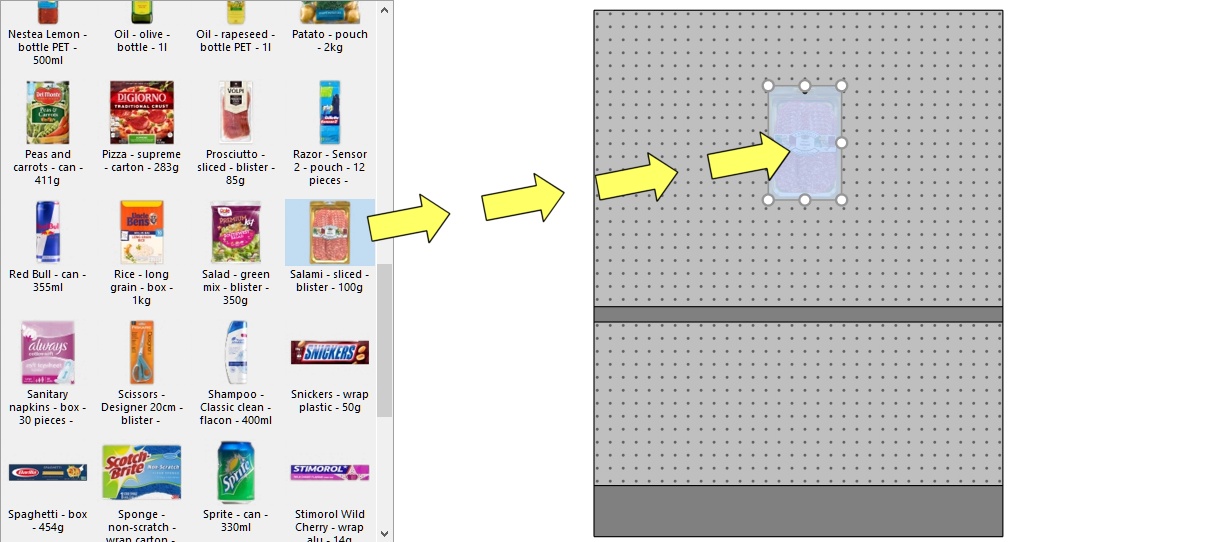
- If you want to place a product designed for shelves on a peg, or vice-versa, hold the Shift key while dragging the product from the catalog to the shelving. The effect is as follows on the behavior of the dragged product:
-
- standard, stackable or tester switches to pegged
- pegged switches to standard
- If you want to add a product in a planogram without it being in your database, for example a placeholder for a competitor product, cf. Insert generic product.
- Release the mouse button once you have reached the desired location. The item is placed on the shelving.
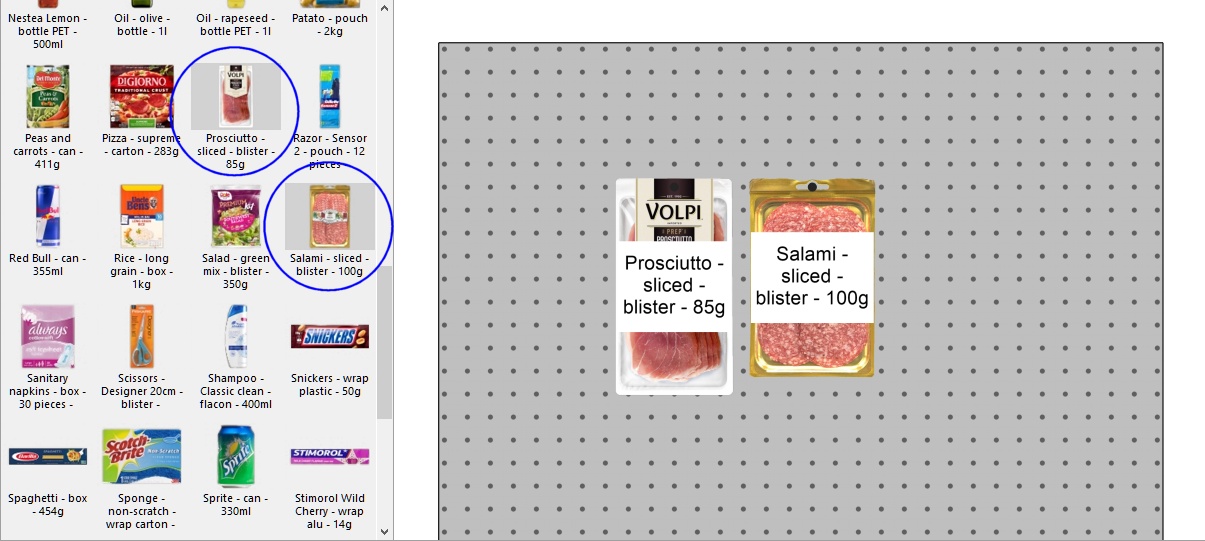
- Once a product has been placed in your planogram, its thumbnail background changes to a lighter color in the catalog, helping you identify the products already used:
Notes on the number of products placed:
- 1 Facings wide and 1 Facings high is placed by default.
- After placing the product, you can change the number of instances that should be placed. This can be done by specifying values (Item Info) or with the mouse (Adjust product quantity).
- Products with tester behavior are always placed in front of other products.
Tips:
- If there is no back panel on your bay, make sure to position your mouse cursor exactly on a shelf when you release the product, otherwise the product won't be placed on the shelf.
- There are times when you may want to temporarily disable collisions to avoid displacing other products while placing a product. Hold the C key pressed while dragging the product to achieve this. Collisions can also be entirely disabled in Collisions (Settings), or for specific products in Collisions (Item properties) in case they must overlap.
- You can lock accessories in place (Locked accessories) to prevent accidentally moving existing accessories while placing products.By default, the actual hooks are displayed in PlanogramBuilder for pegged products. To toggle visibility of the hooks, cf. View peg hooks.
- You can control the area where products can be placed by setting margins: in Parameters (Selected shelves) and Parameters (Selected back panels).
- You can allow products straddling on 2 bay components: Allow lateral overhang (Selected shelves) and Allow lateral overhang (Selected back panels).
Replace products in a planogram
You can replace a product already in your planogram by a product from the catalog. This lets you exchange products in a slot quickly without having to manually delete the product to replace.
Instructions:
- Press and hold your mouse button and the Alt key on a product in the catalog.
- Drag the product from the catalog over the product to replace in your planogram.
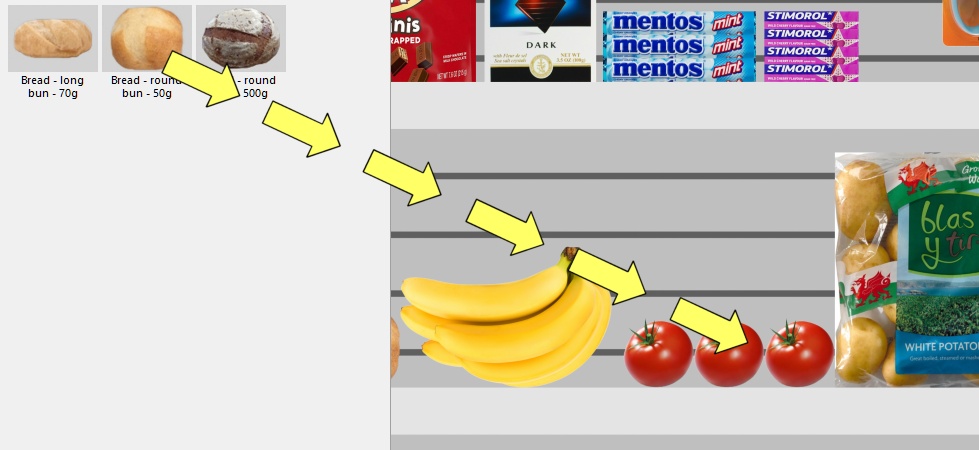
- Release the mouse button and the Alt key.
- The product replaces the old product.
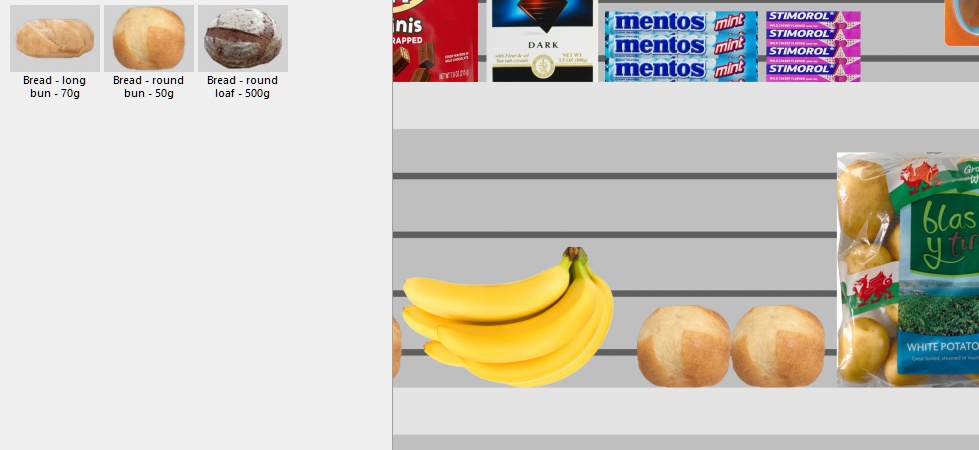
Notes:
When you replace a product, all parameters of the replaced product are transferred to the new product (Behavior (Products), Collisions (Item properties), Width gap, etc.), except the number of instances (Facings wide, Facings high) which is automatically computed as follows:
- The new product will have as many instances as can fit in the space used by the old product block.
- If the new product is larger than the old product block, it will still be placed if there is enough space between the neighboring items.
- If there is not enough space between the neighboring items to place at least one new instance of the new product, the replacement isn’t performed.
E.g., if you replace a product by one that has the exact same dimensions, the same quantity is placed in the space.