Tools and commands (Modify bays)
The object editing toolbar contains several tools and commands to work with shelving in your planogram.


Some additional commands that also apply to most objects can be found in another toolbar described here: General edit commands:
All the tools and commands to work with shelving are also available in Main Menu > Edit:
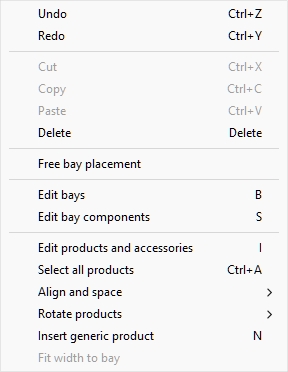
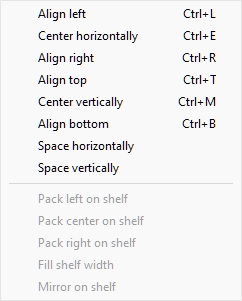
The tools and commands which are specific to Modify bays are described below.
Free bay placement
Specifies whether bays can be positioned and oriented freely in the current project.
- Supported values:
- Pressed (checkmarked): bays can be positioned and oriented freely. This mode is well suited for planograms that represent a retail area with non-adjacent bays.
- Not pressed (not checkmarked): bays cannot be positioned freely. In this mode, they are automatically placed adjacent to each other. You can still move the bays to rearrange their order from left to right. This mode is well suited for planogram projects that represent a single store aisle.
- Default value: Not pressed (not checkmarked)

Example with Free bay placement checkmarked

Example with Free bay placement not checkmarked
Warning: Unchecking Free bay placement in a project that contains freely positioned bays will reposition all bays to be aligned and adjacent to each other. If you accidentally do this, you can recover the changes: Undo (Edit).
Notes:
- The selected value for Free bay placement is saved with the current project.
- If Free bay placement is not activated for your current project and you add another project (with Free bay placement), Free bay placement will automatically be activated for the current project to maintain the positioning the merged shelving.
Edit bays
![]()
This tool lets you select whole bays to perform various operations such as editing their properties, moving and copying them.
- Keyboard shortcut: B
Notes:
- Switching to the task named Modify bays automatically activates this tool. Exception: if the tool named Edit bay components is active, it remains so to avoid loosing the current selection of bay components.
- The keyboard shortcut and the menu command activate this tool, but they don't activate the task: Modify bays.
Advice: If you are using this tool but the task named Modify bays is not active, double-clicking on any bay switches to the task named Modify bays and displays the selected bay properties.
Select (Edit bays)
Bays can be selected and manipulated as whole entities.
- Click on Edit bays in the toolbar or
in the main menu > Edit.

- Select bays:
- To select one bay, click on it in the visualization area.
- To select multiple bays:
i. hold the Ctrl key and click on them.
ii. or draw a rectangle with your mouse pointer across the desired bays.
- Selected bays become highlighted in blue. You can then perform several tasks such as deleting, moving, changing dimensions, etc. You can also change common parameters on all parts of the selected bays. For example, assign one color to all components without having to select each component separately.
- To deselect bays, click on empty zone of visualization area.
Move (Edit bays)
You can move bays with the mouse.
- Click on Edit bays in the toolbar or
in the main menu > Edit.

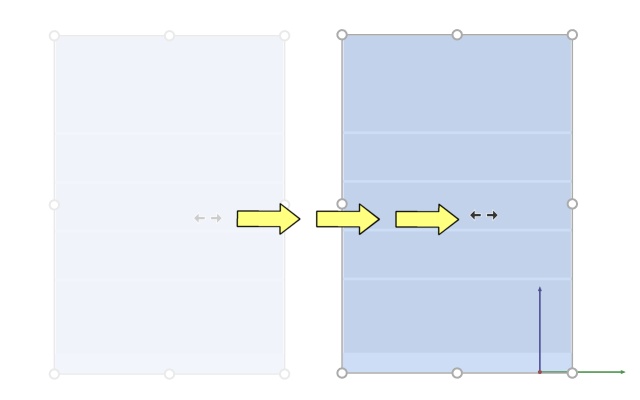
- Select the bays to move. They become highlighted and a move pointer is displayed.
- Drag the selected bays with the left mouse button pressed.
- Release the mouse button.
Free bay placement changes the way the bays are moved:
- With Free bay placement not checkmarked: the bays are to the closest position adjacent to another bay or between two bays, pushing the others to make space.
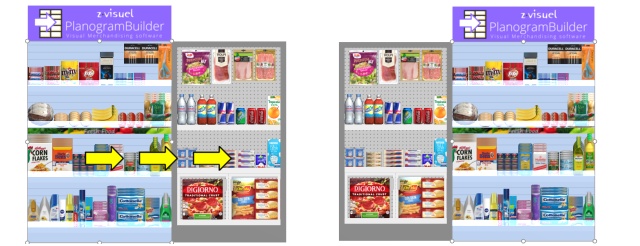
- With Free bay placement checkmarked: the bays are moved in any direction to the target position. If there are other bays at this position, they may overlap. To constrain the movement to a single axis, hold the Alt key pressed and drag the bays along the desired axis (the cursor indicates the axis).
Tips:
- To move bays completely freely, you can hold the space bar while moving, producing a slower motion and preventing position rounding.
Note: Dragging is convenient for quick mouse editing but you can also specify precise position values in the parameters of Selected bays:
Copy by moving (Edit bays)You can copy bays with the mouse.
- Click on Edit bays in the toolbar or
in the main menu > Edit.

- Select the bays to move. They become highlighted and a move pointer is displayed.
- Hold the Ctrl key and drag the selected bay to the desired new position.
- Release the mouse button.
Free bay placement changes the way the bays are copied:
- With Free bay placement not checkmarked: the bays are to the closest position adjacent to another bay or between two bays, pushing the others to make space.
- With Free bay placement checkmarked: the bays are copied to the target position. If there are other bays at this position, they may overlap.
Tips:
- To copy bays completely freely, you can hold the space bar while dragging, producing a slower motion and preventing position rounding.
Note: Copying bays with your mouse is convenient for quickly duplicating bays. You can later reposition them precisely with the parameters of Selected bays:
Resize (Edit bays)
Bays can be resized with the mouse.
Instructions:
- Click on Edit bays in the toolbar or
in the main menu > Edit.

- Select the bays to move. They become highlighted with round handles.
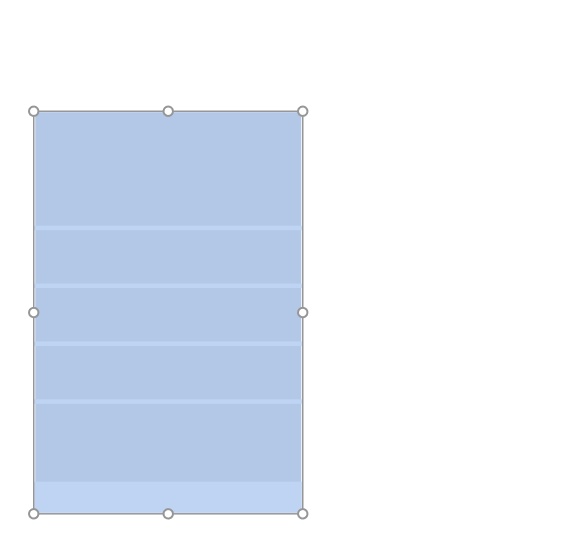
- Grab a handle and drag it until your bays reach the desired size. The corner handles let you resize in two directions, while the handles at the middle of edges let you constrain resizing to one direction.
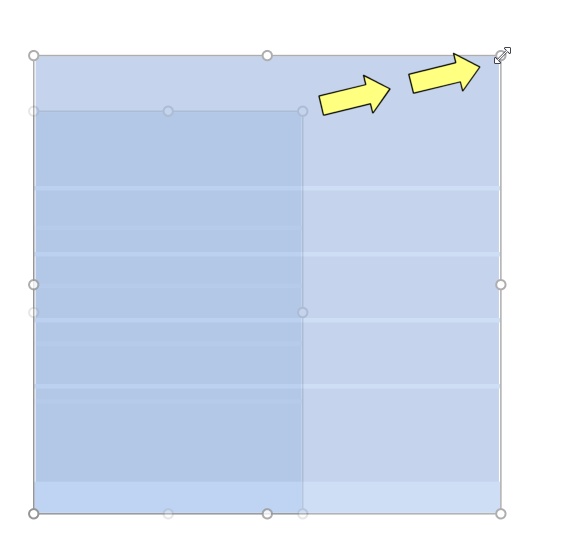
- Release the mouse button. The bays are resized. Note that shelf and panel spacing is automatically recalculated while maintaining the thickness of such components.
Important note:
- cf. Resizable with bay (Selected bay components). This parameter defines for each component if it should be scaled with the whole bay.
Notes:
- Bays are normally resized to 1 cm or 0.5” rounded position values.
- To resize bays completely freely, you can hold the space bar while resizing, producing a slower motion and preventing dimension rounding.
Tips:
- Handles are convenient for quick mouse resizing, but you can also specify precise dimension values in the parameters of Selected bays:
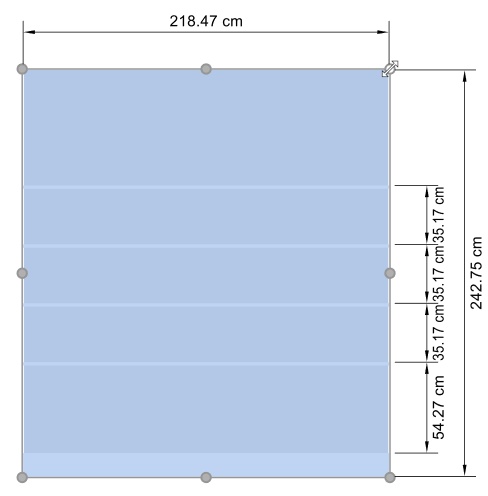
- With View dimensions, you can display the dimensions of the resizing rectangle while resizing. This is useful if you know in advance the space to allocate to the bays:
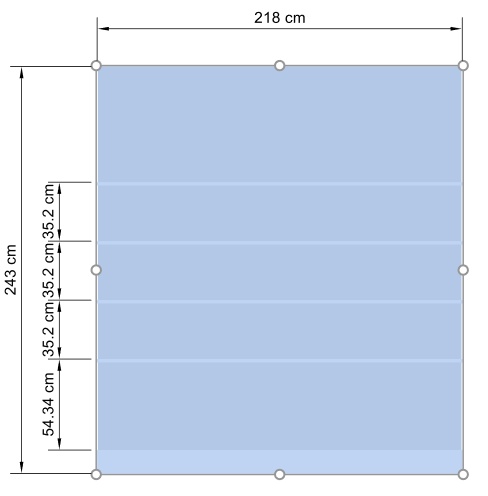
- With View dimensions, you can also display the actual exact dimensions used by all bays:
Free bay placement
Edit bay components
![]()
This tool lets you select bay components (individual part of the bays) to perform various operations such as editing their properties, moving and copying them.
- Keyboard shortcut: S
Advice: If you are using this tool but the task named Modify bays is not active, double-clicking on any bay component switches to the task named Modify bays and displays the selected bay component properties.
Select (Edit bay components)
You can select each bay component separately and perform various operations such as editing the components and their properties or moving and copying components.
1. Click
on Edit bay components in the toolbar or in the main
menu > Edit. ![]()
2. Select bay components:
- To select one component, click on it in the visualization area.
- To select multiple components:
-
- hold the Ctrl key and click on them.
- or draw a rectangle with your mouse pointer across the desired components.
3. Selected components become highlighted in blue. You can then perform several tasks such as deleting, moving, changing dimensions, etc. You can also change common parameters for selected components (cf. the list of parameters in Selected bay components). For example, assign one color to several components.
To deselect bay components, click on an empty zone of the visualization area.
Note: you can select multiple components each belonging to different bays.
Move (Edit bay components)
You can move selected bay components with your mouse:
- Click on Edit bay components in the
toolbar or in the main menu > Edit.

- Select bay components to move. They become highlighted and a move pointer is displayed.
- Drag the selected components with the left mouse button pressed. To constrain the movement to a single axis, hold the Alt key pressed and drag the components (the cursor indicates the axis).
- Release the mouse button when you are happy with the new position.
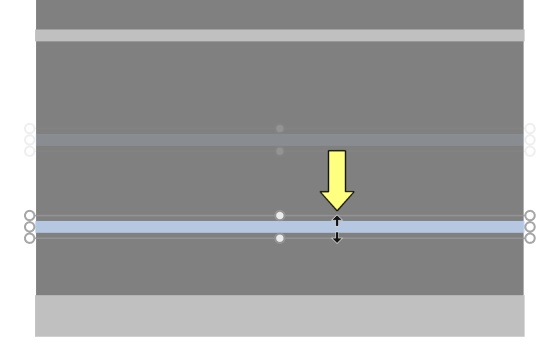
Notes:
- If you move a component onto another bay, the component automatically becomes part of the targeted bay.
- Bay components are normally moved to 1 cm or 0.5” rounded position values. For example, if you move a shelf up from an original distance from the ground of 141.2 cm, it will be repositioned at a rounded new distance from the ground (e.g., 163.0 cm).
- To move a component without rounding its new position, hold the space bar while moving, producing a slower motion and preventing position snapping.
- When moving shelves, Collisions (Settings) are automatically temporarily de-activated to allow crossing other shelves even if there are products.
Advice: Dragging is convenient for quick mouse editing but you can also specify precise position values in the parameters of Selected bay components:
Copy (Edit bay components)
You can copy selected bay components with the mouse.
- Click on Edit bay components in the
toolbar or in the main menu > Edit.

- Select bay components to copy. They become highlighted and a move pointer is displayed.
- Hold the Ctrl key and drag the selected components. To constrain the movement to a single axis, also hold the Alt key pressed and drag the components (the cursor indicates the axis).
- Release the mouse button when you are happy with the position.
Notes:
- If you copy a component onto another bay, the component automatically becomes part of the targeted bay.
- Bay components are normally copied to 1 cm or 0.5” rounded position values. For example, if you copy a shelf up from an original distance from the ground of 141.2 cm, it will be positioned at a rounded new distance from the ground (e.g., 163.0 cm).
- To copy a component without rounding its position, hold the space bar while copying, producing a slower motion and preventing position snapping.
- When copying shelves, Collisions (Settings) are automatically temporarily de-activated to allow crossing other shelves even if there are products.
Advice: Copying bay components with your mouse is convenient for quickly duplicating shelves or other panels. You can later reposition them precisely with the parameters of Selected bay components:
Resize (Edit bay components)
You can resize bay components with the mouse.
Click on Edit bay components in the
toolbar or in the main menu > Edit. ![]() Select bay components to copy. They become
highlighted with round handles. If the round handles do not appear
on the selected components, use Zoom to enlarge them on screen.
Select bay components to copy. They become
highlighted with round handles. If the round handles do not appear
on the selected components, use Zoom to enlarge them on screen.
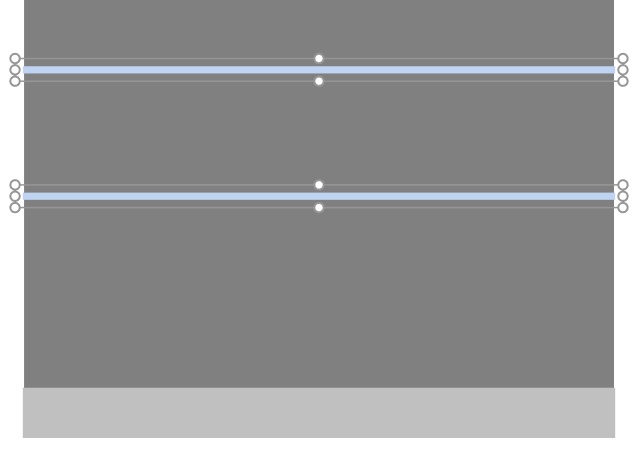
- Grab a handle and drag it until your components reach the desired size. The corner handles let you resize in two directions, while the handles at midpoint along edges let you constrain resizing to one direction.
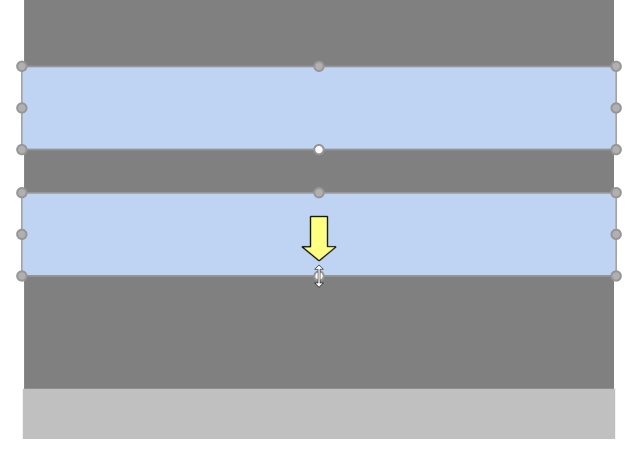
- Release the mouse button.
Notes:
- Bay components are normally resized to 1 cm or 0.5” rounded position values.
- To resize a component completely freely, you can hold the space bar while moving, producing a slower motion and preventing dimension rounding.
Advice: With View dimensions, you can display the dimensions of the resizing rectangle while resizing. This is useful if you know in advance the space to allocate to the bay components:

Advice: With View dimensions, you can also display the actual exact dimensions used by all bay components:

Note: Handles are convenient for quick mouse resizing, but you can also specify precise dimension values in the parameters of Selected bay components:
Align and space (Selected bay components)
You can apply various spacing and alignment presets to a group of selected bay components. For example, you can select multiple shelves and space them all evenly vertically.
Instructions:
1. Click
on Edit bay components on the toolbar or in Main Menu
> Edit. ![]()
2. Select the desired bay components. They become highlighted and a move pointer is displayed.
3. Click on one of the align commands on the object editing toolbar or in Main Menu > Edit> Align and space.
4. Selected bay components are aligned accordingly as described below.
Align left (Selected bay components)
Align the selected objects horizontally to their leftmost edge.
- Keyboard shortcut: Ctrl + L
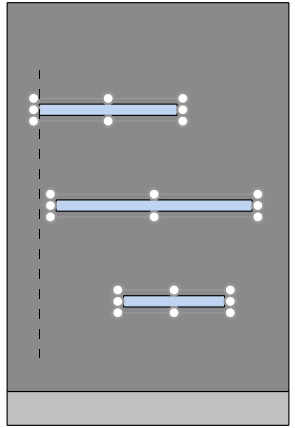
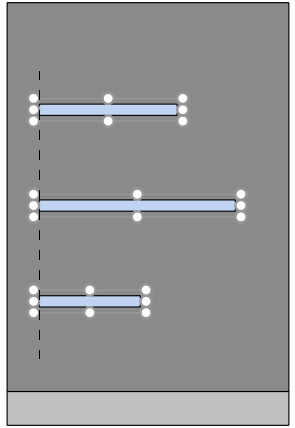
Image on the left: Before alignment
Image on the right: Align left (Selected bay components)
Center horizontally (Selected bay components)
Align the selected objects to their horizontal center.
- Keyboard shortcut: Ctrl + E
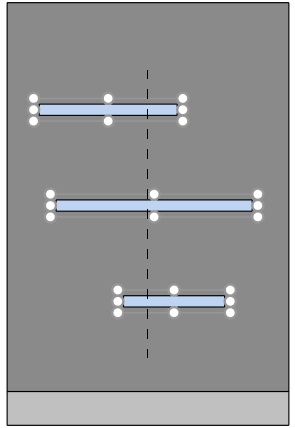
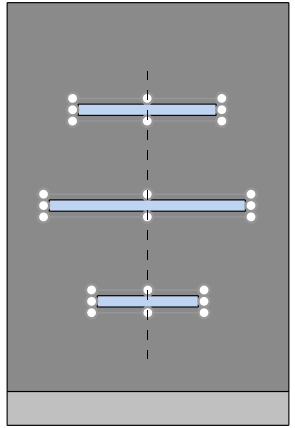
Image on the left: Before alignment
Image on the right: Center horizontally (Selected bay components)
Align right (Selected bay components)
Align the selected objects horizontally to their rightmost edge.
- Keyboard shortcut: Ctrl + R
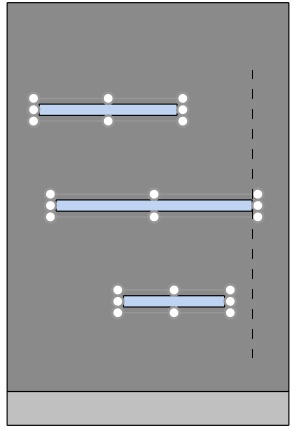
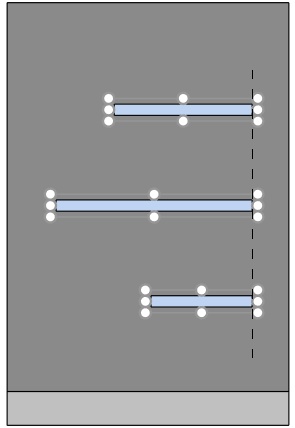
Image on the left: Before alignment
Image on the right: Align right (Selected bay components)
Align top (Selected bay components)
Align the selected objects vertically to their topmost edge.
- Keyboard shortcut: Ctrl + T
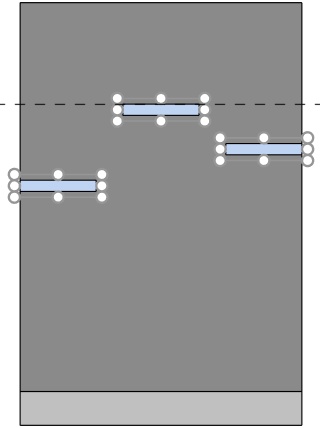
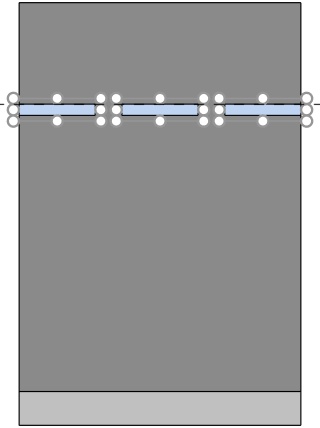
Image on the left: Before alignment
Image on the right: Align top (Selected bay components)
Center vertically (Selected bay components)
Align the selected objects to their vertical center.
- Keyboard shortcut: Ctrl + M
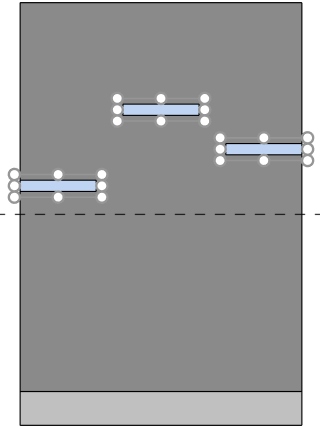
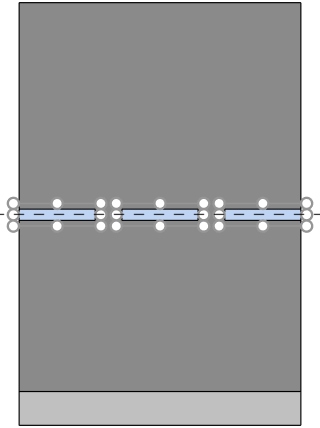
Image on the left: Before alignment
Image on the right: Center vertically (Selected bay components)Align top (Selected bay components)
Align bottom (Selected bay components)
Align the selected objects vertically to their lowest edge.
- Keyboard shortcut: Ctrl + B
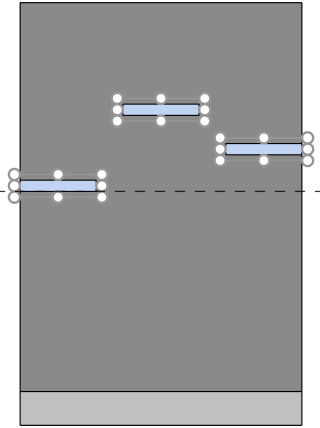
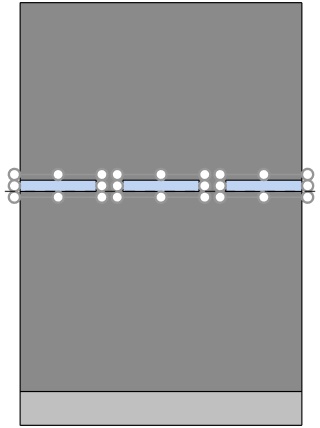
Image on the left: Before alignment
Image on the right: Align bottom (Selected bay components)
Space horizontally (Selected bay components)
Distribute the selected objects horizontally with an equal gap between them without changing the total space used.
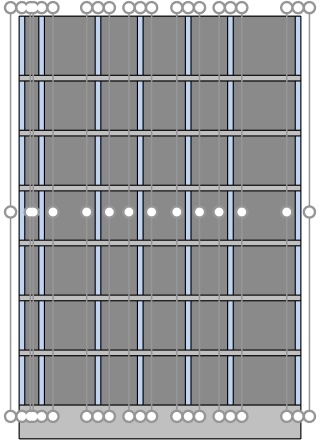
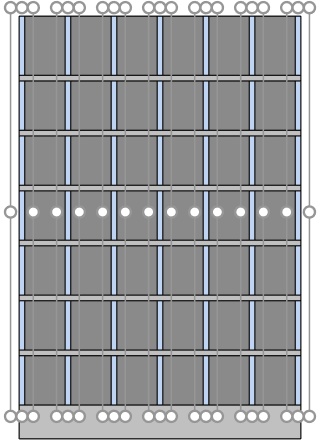
Image on the left: Before spacing
Image on the right: Space horizontally (Selected bay components)
Space vertically (Selected bay components)
Distribute the selected objects vertically with an equal gap between them without changing the total space used.
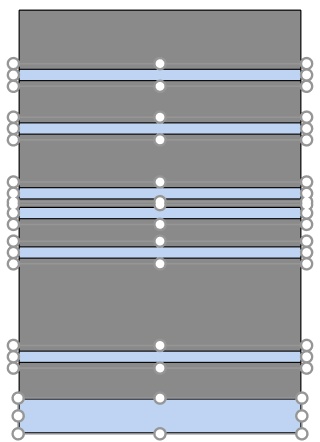
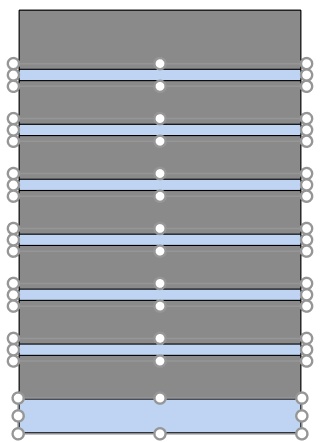
Image on the left: Before spacing
Image on the right: Space vertically (Selected bay components)