Selected room elements
If you have selected one or more room elements, this area lets you edit their properties.
The listed properties depend on the type of element as illustrated below.
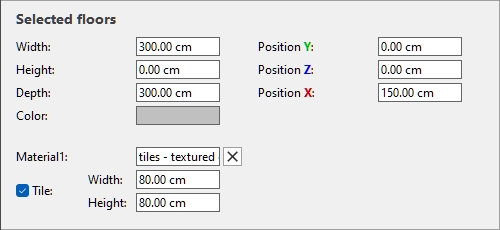
Selected floors
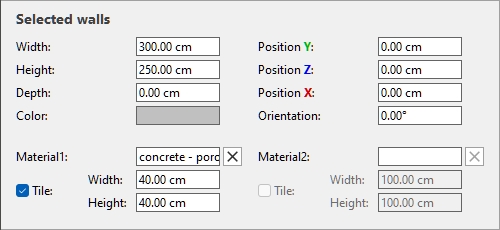
Selected walls
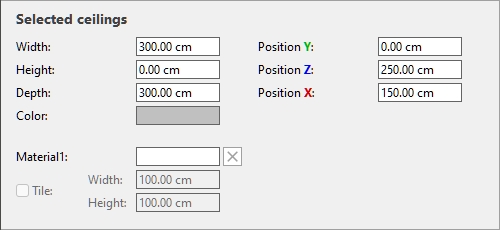
Selected ceilings
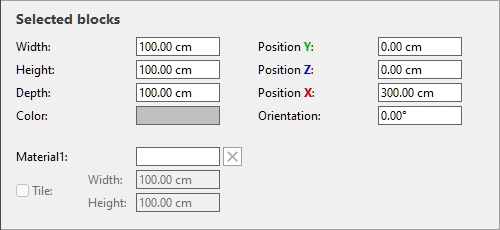
Selected blocks
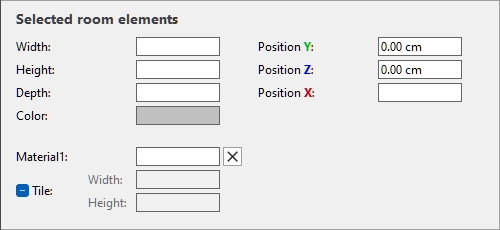
Selected room elements
Parameters (Selected room elements)
Width (Selected room elements)
The physical width of the room element in the current measurement unit.
- Supported values: positive numeric value [0-9 and decimal point]
- Default values:
- Floor, Wall, Ceiling: 600 cm (or equivalent according to Measurement unit)
- Block: 100 cm (or equivalent)
- Custom Room elements (Personal): as defined in the database
- Example: 240
Advice: You don't need to type the actual measurement unit (e.g., cm), only the value.
Advice: The width can also be defined with the mouse. cf. Resize .
Height (Selected room elements)
The physical height of the room element in the current measurement unit.
- Supported values: positive numeric value [0-9 and decimal point]
- Default values:
- Floor, Ceiling: 0 cm
- Wall: 300 cm (or equivalent according to Measurement unit)
- Block: 100 cm (or equivalent)
- Custom Room elements (Personal): as defined in the database
- Example: 10.2
Note: You can add thickness to floors and ceiling by changing their height.
Advice: You don't need to type the actual measurement unit (e.g., cm), only the value.
Advice: The height can also be defined with the mouse. cf. Resize .
Depth (Selected room elements)
The physical depth of the room element in the current measurement unit.
- Supported values: positive numeric value [0-9 and decimal point]
- Default values:
- Floor, Ceiling: 600 cm (or equivalent according to Measurement unit)
- Wall: 0 cm
- Block: 100 cm (or equivalent)
- Custom Room elements (Personal): as defined in the database
- Example: 7.14
Note: You can add thickness to walls if desired by changing their depth.
Advice: You don't need to type the actual measurement unit (e.g., cm), only the value.
Advice: The depth can also be defined with the mouse. cf. Resize .
Resizable with room (Selected room elements)
A toggle located on the right of each dimension (Width, Height, Depth).
It determines how the corresponding element dimension is treated when the whole room is resized by entering overall room dimensions.
- Supported values:
- Pressed (resizable): The element dimension will be scaled proportionally when resizing the whole room. Apply this setting for element dimensions that depend on or define the overall room dimension, for example the height of walls, or the width and depth of a floor.
- Not pressed (not resizable): The element dimension will not change when resizing the whole bay. Apply this setting for element dimensions that have fixed values, independent of the overall room dimension, for example the thickness of walls.
- Default values:
Position Y (Selected room elements)
The position of the selected elements base point(s) on the Y axis in the current measurement unit.
- Supported values: positive/negative numeric value [+-0-9 and decimal point]
- Default values: no default value (the initial position depends on where the element was dragged)
- Example: 0
Note: The tripod with colored axes is also shown in the visualization area, indicating the space origin point (0, 0, 0) and the direction of each axis.
Advice: The position can also be defined with the mouse. cf. Move (Edit room elements).
Position Z (Selected room elements)
The position of the selected elements base point(s) on the Z axis in the current measurement unit.
- Supported values: positive/negative numeric value [+-0-9 and decimal point]
- Default values: no default value (the initial position depends on where the element was dragged)
- Example: 420
Note: The tripod with colored axes is also shown in the visualization area, indicating the space origin point (0, 0, 0) and the direction of each axis.
Advice: The position can also be defined with the mouse. cf. Move (Edit room elements).
Position X (Selected room elements)
The position of the selected elements base point(s) on the X axis in the current measurement unit.
- Supported values: positive/negative numeric value [+-0-9 and decimal point]
- Default values: no default value (the initial position depends on where the element was dragged)
- Example: -200
Note: The tripod with colored axes is also shown in the visualization area, indicating the space origin point (0, 0, 0) and the direction of each axis.
Advice: The position can also be defined with the mouse. cf. Move (Edit room elements).
Orientation (Selected room elements)
Only applicable to the following elements: Wall, Block
The angle of rotation of the selected elements in degrees around their respective vertical axis (Z).
- Supported values: positive/negative numeric value [+-0-9 and decimal point]
- Default values:
- Wall: no default value (the initial orientation depends on where the wall was dragged)
- Block, Custom Room elements (Personal): as defined in the database: 0
- Example: -45
Color (Selected room elements)
This property lets you specify a uniform color for the selected room elements.
The color can be specified as follows:
Color text field:
- Supported values: HTML color codes (with or without the # prefix, not case-sensitive). Complete reference of theses HTML color codes can be found for example at:
- Default value: #C0C0C0 (light gray)
- Example: FF8000 (orange)
Color sample:
- Click on the color sample next to Color to display the color palette.
- Select the desired color.
- Click OK.
Notes:
- A color cannot be applied to Custom Room elements (Personal)
- The color is overridden by any material that has been applied (cf. Materials).
Material1, Material2 (Selected room elements)
The material(s) assigned to the selected elements.
- Supported values: the name of a material from the list of Materials
- Default value: empty
- Example: bricks - red
Instructions:
- To apply materials, cf. Apply materials to an element.
- To remove an applied material: click on the small red cross button next to the material name.
Notes:
- Materials cannot be applied to Custom Room elements (Personal)
- Material2 only applicable to the following element: Wall
cf. Tile.
Note: for materials provided with PlanogramBuilder, the initial setting is not defined in the database, but can still be changed for the material assigned to the selected elements.
Width
cf. Width (Item properties) (for materials).
Note: for materials provided with PlanogramBuilder, the initial value is not defined in the database, but can still be changed for the material assigned to the selected elements.
Height
cf. Height (Item properties) (for materials).
Note: for materials provided with PlanogramBuilder, the initial value is not defined in the database, but can still be changed for the material assigned to the selected elements.
Examples of materials with and without tiling
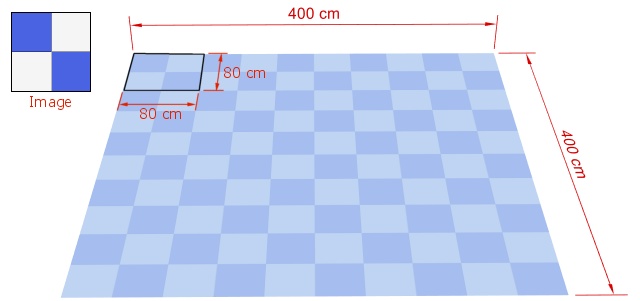
Example of a material with Tile, Width 80 cm, Height 80 cm. The image is repeated.
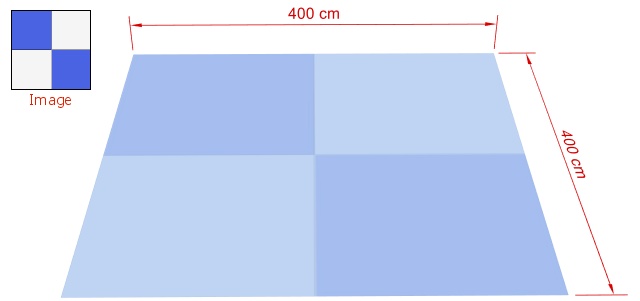
Example of a material without Tile. The image is stretched to fill the element.