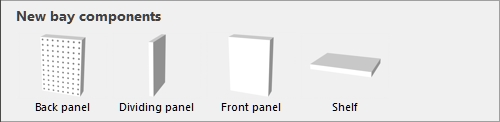
New bay components
This catalog contains parametric components provided with the software to create or modify furniture in your planogram.
These ready-to use components are usually suitable to create most types of furniture, such as shelves, perforated panels, table legs, table tops, posts, etc.
The following predefined bay components are available.
Note: You can mix components of all types on the same bay.
Advice: You may not always need to use these individual components: complete gondolas and other standard shelving units can also be created in other tasks. cf. Create bays and Predefined examples (Template catalog).
Back panel
A component onto which you can place specific types of products (pegged) and accessories (panel, bay header). Use this for pegboards and slat walls.
Dividing panel
A component which can be used as vertical separation to create pigeon holes or side panels.
Note: Products are not allowed to cross this component if Collisions (Selected bay components is checkmarked for this component.
Front panel
A component best used to represent front doors or other front panels in your shelving units.
You cannot put products or accessories on this type of component, but it can be hidden in case you have products behind it (cf. View front panels).
By default, front panels span the height and width of the bay and are positioned at its front.
Shelf
A component onto which you can place specific products (standard, stackable, tester) and accessories (Shelf strip, sticker).
Generic
This type of component is suitable for any other structural part of furniture which are neither shelves, nor back panels, nor front panels, for example feet and posts.
Create a new bay with New bay components
Instructions:
- Drag the desired new component from the palette onto some empty space in the visualization area. This also works if your project is currently empty.
- Change the properties of the new component if needed (Edit bay components).
- Follow the instructions below to add more components to this bay.
Add New bay components to an existing bay
Instructions:
- Make sure you have at least one bay in your planogram. Otherwise cf. Create bays.
- Drag each desired new component from the palette onto the desired bay.
- Change the properties of the new components if needed (Edit bay components).
- Save your empty bay as a project if you wish to re-use it later.
Replace Bay components in an existing bay
You can replace a component already in your planogram by a different one from the catalog.
When replacing components, many parameters of the replaced component are transferred to the new component (Width, Height, Depth, Color, Display the bay front image, Collisions, Lateral offset, Distance to bottom). The settings for Resizable with bay will however use the default values of new component.
This lets you change the type of component quickly without having to manually re-create a new one.
Instructions:
- Press and hold your mouse button and the Alt key on a component in the catalog.
- Drag the new component from the catalog (e.g. Shelf) over the component to replace (e.g. Generic) in your planogram.
- Release the mouse button and the Alt key.
- The new component replaces the old one. You can see its type has changed (from Selected bay components to Selected shelves).