Tools and commands (Navigation)
The toolbar includes common tools and commands to navigate in the visualization area:

These and additional related commands are available in Main Menu > Navigation:
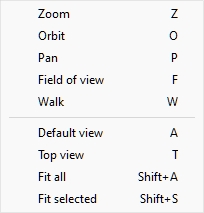
Zoom
This tool lets you zoom in and out in the visualization area.

- Keyboard shortcut: Z
Instructions:
Method 1: dedicated tool mode
- Activate the tool with its button, menu entry or keyboard shortcut.
- While holding the left mouse button down in the visualization area, move the mouse up to zoom in, or down to zoom out.
- Switch to another tool after you have finished zooming.
Method 2: temporary mode
You can also zoom in and out without activating the tool. This method provides a convenient temporary zoom while keeping any other tool active, such as editing tools:
- scroll your mouse wheel in the visualization area.
Note: When you zoom in, the scene is centered on the location of your mouse pointer.
Tip: to zoom slower, hold Space bar while zooming.
Orbit
This tool lets you rotate the scene viewpoint.

- Keyboard shortcut: O
Instructions:
Method 1: dedicated tool mode
- Activate the tool with its button, menu entry or keyboard shortcut.
- While holding the left mouse button down in the visualization area, move your mouse in the direction you wish to rotate.
Method 2: temporary mode
You can also pivot the view without activating the tool. This method provides a convenient temporary orbit while keeping any other tool active, such as editing tools:
- While holding Ctrl + middle mouse button pressed, drag the mouse in the visualization area.
Note: The scene rotates around the position of your mouse pointer.
Tip: To pivot slower, hold Space bar while pivoting.
Pan
This tool lets you shift the viewpoint left, right, up or down.

- Keyboard shortcut: P
Instructions:
Method 1: dedicated tool mode
- Activate the tool with its button, menu entry or keyboard shortcut.
- While holding the left mouse button down in the visualization area, move your mouse in the direction you wish to shift the view.
Method 2: temporary mode
You can also pan the view without activating the tool. This method provides a convenient temporary pan while keeping any other tool active, such as editing tools:
- While holding the middle mouse button pressed, drag the mouse in the visualization area.
Tip: to pan slower, hold Space bar while panning.
Field of view
This tool lets you increase and decrease the perspective effect (FOV) in the visualization area. It is like changing the focal length of a lens on a real camera.

Keyboard shortcut: F
Instructions:
- Activate the tool with its button, menu entry or keyboard shortcut.
- While holding the middle mouse button pressed, move your mouse up or down until you are happy with the perspective.
Notes:
- While the tool is active, you can click on the visualization area to reset its value to a default value.
- The default value is also automatically reset to when closing PlanogramBuilder.
Walk
This tool lets you move your viewpoint in the visualization area as if you were walking in the store.
- Keyboard shortcut: W
Instructions:
Method 1: mouse navigation
- Activate the tool with its button, menu entry or keyboard shortcut.
- While holding the middle mouse button pressed, move your mouse in the direction you want to walk:
- Move forward: mouse direction up
- Move backwards: mouse direction down
- Turn left: mouse direction left
- Turn right: mouse direction right
- Once you have reached the desired direction and speed, hold the mouse at the same location to maintain the speed and direction.
- Move the mouse in the desired direction when you want to adjust direction or speed.
- To look up or down, press the left, then the right mouse buttons and hold both down. You can also use method 2 below.
Method 2: keyboard navigation
- Activate the tool with its button, menu entry or keyboard shortcut.
- Use the following keyboard keys to walk:
- Turn left: Left arrow
- Turn right: Right arrow
- Move forward: Up arrow
- Move backwards: Down arrow
- Look up: Space bar + Up arrow
- Look down: Space bar + Down arrow
Note: As soon as you start a new walk with this tool, the viewpoint is automatically relocated to match an average human eye level and sight angle.
Tips:
- To walk slower, hold the Space bar while walking.
- You may want to widen the field of view for a more lifelike experience when walking (Field of view).
Default view
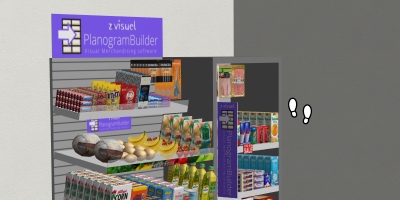
This command resets the visualization area to a predefined view which fits all the visible elements in your planogram.
This default view varies depending on which task is active when you apply the command:
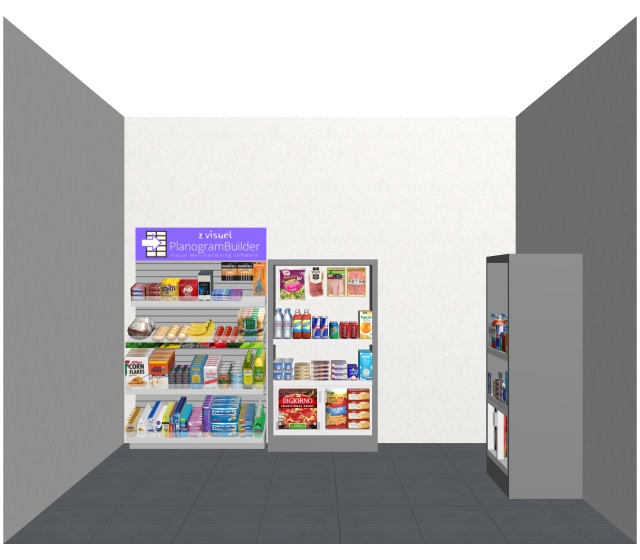
- In the task named Room, your planogram is shown from the front looking downwards to facilitate room creation and edition, as in the example below: