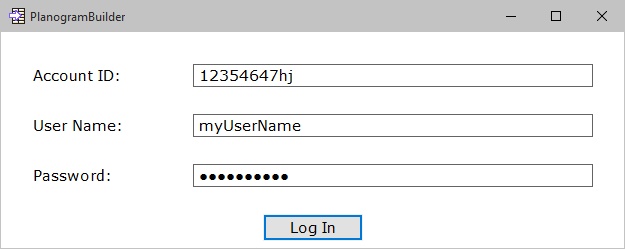
Launch PlanogramBuilder
Once installation is complete, you can run PlanogramBuilder:
- Double-Click on the PlanogramBuilder icon on your Desktop or in your Windows Start Menu (All programs (or All Apps) > PlanogramBuilder)
![]()
- Enter your account ID, user name and password as provided to you by email after purchase or registration.

- Click on Log In.
Notes:
- You need to be connected to the Internet when using PlanogramBuilder since the database is online and most functions work with dynamic content.
- Please refer to: Connection error, if you see such a message.
- By default, your login credentials are automatically remembered for subsequent use of PlanogramBuilder. If you prefer entering your login information every time you launch the application, cf. Save user & password.
Wrong Password
If you mistype your password, please try again with the correct password, but note that after 3 attempts with the wrong password, your user account will be locked for security reasons and you will have to contact zVisuel at planogrambuilder@zvisuel.com to unlock it.
If you forgot your password:
- If you see a form with the following title: Forgot your password ?, you can use it to request resetting your password.
- If you don’t see the form to request a password reset, first verify your password with the person in charge of PlanogramBuilder in your company. If not applicable, please contact your reseller or zVisuel at planogrambuilder@zvisuel.com.
Command line parameters
There are a few parameters you can add to the PlanogramBuilder shortcut or command to modify the way PlanogramBuilder runs.
accountID
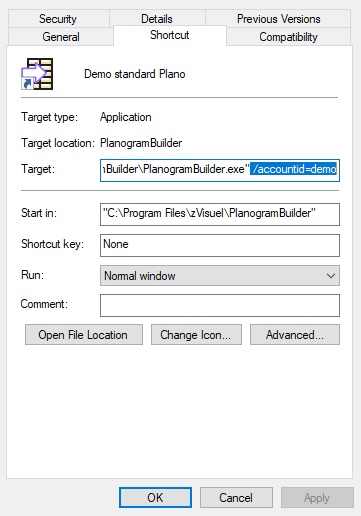
This parameter lets you predefine an accountID to use when launching PlanogramBuilder. This option is useful mostly if you use several distinct PlanogramBuilder accountIDs. You can create several copies of PlanogramBuilder shortcut and assign a different accountID to each shortcut, so you will be able to launch directly with the desired account.
- Supported values: any valid account (accountID) can be used as value for this parameter.
- Format: /accountID=value
- Example: PlanogramBuilder.exe /accountID=goodcompany_ihrpz437
Note: This parameter is not case sensitive.
Instructions:
- Right-click on the PlanogramBuilder shortcut.
- In the context menu, click Properties.
- In Properties > Shortcut > Target, type the parameter after the application path.

- Click OK to save your changes.
- Now click on the shortcut icon to start PlanogramBuilder using your parameter.